Click Edit >
System Tables > Conditions > All Conditions if you want to
access all conditions; or Edit > System
Tables > Conditions > Chief Complaints to access complaints,
Edit > System Tables > Conditions
> Diagnoses to access diagnoses;
Edit > System Tables > Conditions > Procedures to access
procedures, and Edit > System Tables
> Conditions > Results to access results.
In the Conditions Search dialog you have the ability
to search for existing conditions, as well as add, modify, or remove those
conditions. If you accessed All Conditions, you have the ability to select
a Condition Type to narrow your
search of conditions. If you accessed the Conditions Search dialog via
the Chief Complaints, Diagnoses, Procedures, or Results option, you can
only search for the type of conditions selected, and the Condition Type
field will be grayed out.
To search for a condition, select the applicable Search
Column and Search Type,
and then type into the Description field. The system will return conditions
that match that description for the Search Column and Search Type selected.
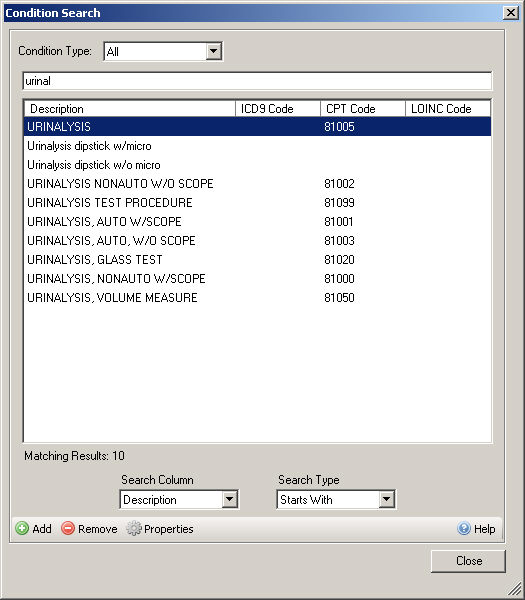
To add a new condition, click the Add
button. To modify an existing condition, find and highlight the applicable
condition, and then click the Properties
button. (You can also double-click the applicable condition to access
the Conditions Properties dialog.) To remove an existing condition, find
and highlight the applicable condition, and then click the Remove
button.
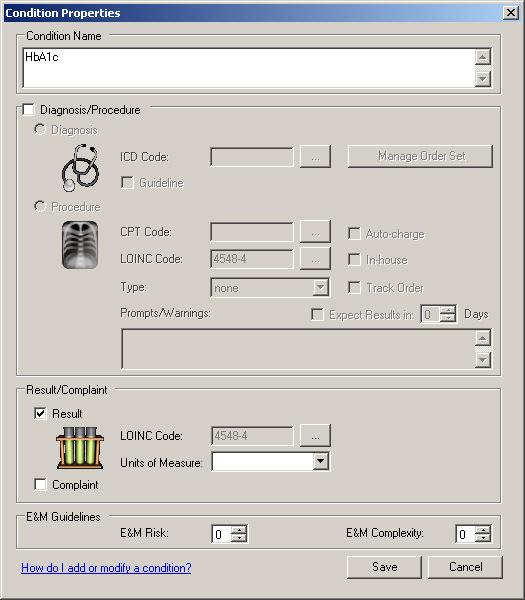
In the Conditions Properties dialog you have the
ability to add and modify conditions. When adding and modifying conditions
applicable fields will become accessible depending upon what specific
options are selected. For example, if the condition you are adding or
modifying is a procedure, then the Procedure
option will be selected allowing the procedure fields (CPT Code, LOINC
Code, Type, Auto-charge, Prompts/Warnings, etc.) will become accessible.
If the Procedure option is selected, then the diagnosis information will
be grayed out and inaccessible. If you selected the Diagnosis
option, then the diagnosis fields will become accessible, but the procedure
fields will be grayed out and inaccessible. A condition cannot be both
a diagnosis and a procedure. However, a condition can be a diagnosis,
result, and complaint. Likewise, a condition can also be a procedure,
result, and complaint.
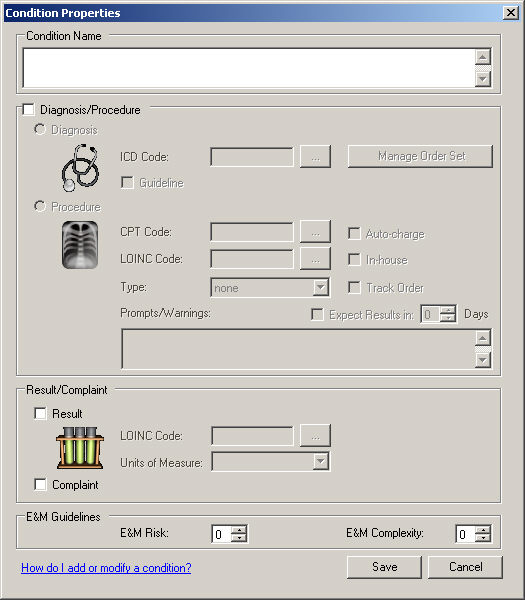
In the Condition Name field, enter or modify the
Name of the condition.
Check the Diagnosis/Procedure
option if this condition is a diagnosis or procedure. This will cause
the Diagnosis and Procedure options to be accessible.
Check the Diagnosis
option if the condition is a diagnosis. When this option is selected the
ICD Code and Guideline
fields, as well as the Manage Order Set
button, will become available.

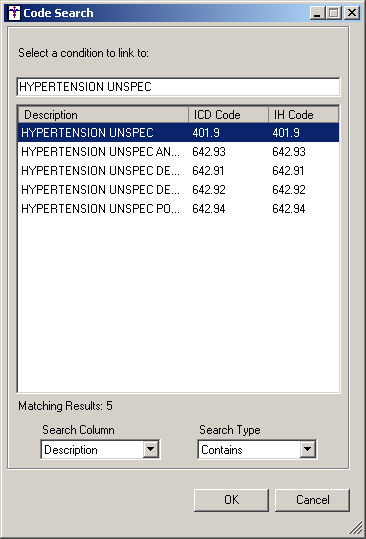
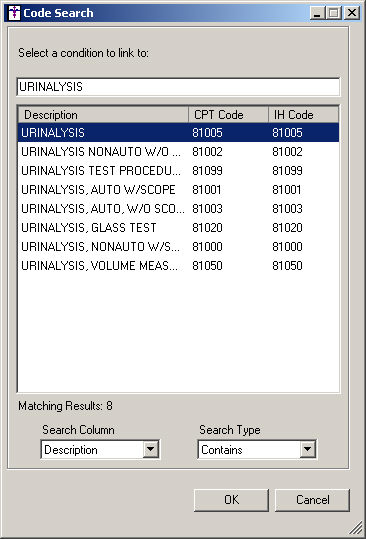
Click the ICD Code: button to attach an ICD-9
Code to the diagnosis condition you are adding or modifying. This
will open a Code Search dialog, allowing you to search for the correct
ICD-9 Code for the diagnosis condition.
Check the Guidelines option
if you want to mark the diagnosis as a disease guideline. When this option
is selected, a "(G)" will appear next to the diagnosis in checklists.
Click the Manage Order Set
button to Link
Order Sets to a Diagnosis.
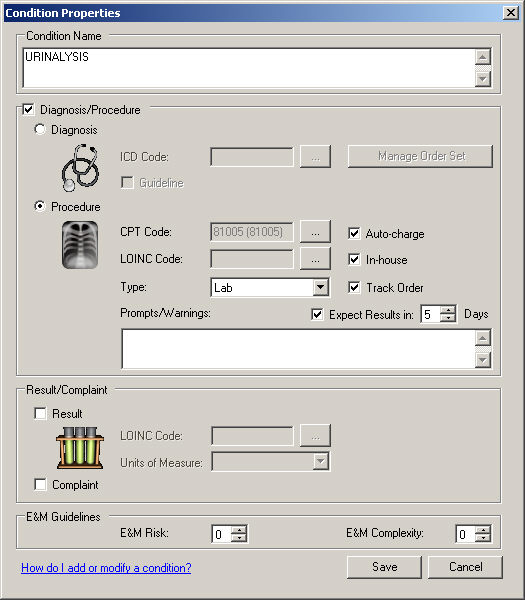
Check the Procedure
option if the condition is a procedure. When this option is selected the
CPT Code, LOINC
Code, Type,
Auto Charge, and Prompts/Warnings fields become
available.
Click the CPT Code: button to attached an CPT
Code to the procedure condition you are adding or modifying. This
will open a Code Search dialog, allowing you to search for the correct
CPT Code for the procedure condition.
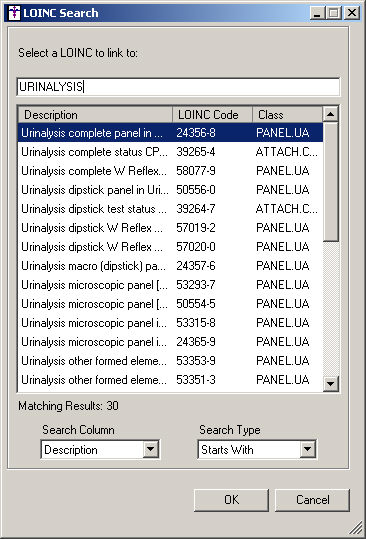
Click the LOINC Code: button to attached an LOINC
Code to the procedure condition you are adding or modifying. This
will open a LOINC Search dialog, allowing you to search for the correct
LOINC Code for the procedure condition.
In the Type field, select the Procedure
Type (Image, Immunization,
Implant/Device, Injection,
Lab, None, Surgery, or Test) for the procedure,
as needed.
NOTE: If Image, Injection,
Lab, or Test
is selected for the Type, the In-house
and Track fields will become accessible.
NOTE: If
the Image, Lab,
or Test is selected for the Type,
the Order
Priority
field will be active in the Order Procedure dialog, allows you to selection
the priority (Routine or Stat) for those procedures.
Check the In-house option if
this procedure is performed at your location (in-house).
Check the Track Order option
if you want To-Do List items to be produced when this procedure is ordered.
If this option is checked, then the Expect Results in _ Days field will
become accessible, allowing you to configure how many days into the future
that results should be expected for this procedure.
Check the Expected Results in
option and configure the number of Days
into the future that should default for this procedure, if applicable.
Check the Result
option if the condition is a result. When this option is selected
the corresponding LOINC
Code and Unit of Measure fields
become
available. When a condition is tagged as a Result, the results for this
condition can appear in Flow Sheets.
NOTE: Whenever a condition is configured as a Result, this condition
can be tagged in a Checklist
Finding or a Pick
List
so that whenever the finding or pick list item is selected in a chart
note, the system will automatically update any user-created
sections of the face sheet
(if the result finding tagged in the pick list is a configured
condition) with the result finding and selected item from the pick
list.
Click the LOINC Code: button to attached an LOINC
Code to the result you are adding or modifying. This will open
a LOINC Search dialog, allowing you to search for the correct LOINC Code
for the result.
In Unit of Measure field, select the applicable Unit
of Measure for the result you are adding or modifying, if applicable.

Check the Complaint
option if the condition is a patient complaint.

In the E&M Guidelines section you can enter
or select the E&M Risk and/or
the E&M Complexity for the
condition you are adding or modifying.
When finished, click the Save
button.
You will then return to the Conditions Search dialog. Click the Close button when finished.