Click Chart >
Scan Document.
In the Scans section of the Scan Management dialog,
highlight the Scanned Item you
want to insert. If you do not see the scanned item, change the scan location
from Local Files to Unassigned Files
in the upper left.
Select the Patient
whose chart you want to insert the scanned item into.
In the Send
to field, select a User
whose To-Do List you want this note to appear, if applicable. If you do
not select a user, this document will be saved into the patient chart
and will not appear on a To-Do List.
In the Heading field, select or enter a Heading
for the scan.
In the Date field, modify the Date,
as needed.
In the Practice field, select the proper Practice, if needed.
In the Folder field, select the Folder
you would like the scan to be placed.
NOTE: If a Heading has a default folder set up, that folder will appear
in the Folder field automatically.
In the Provider field, select a Provider,
if needed.
In the Case field, select the proper Case,
as needed.

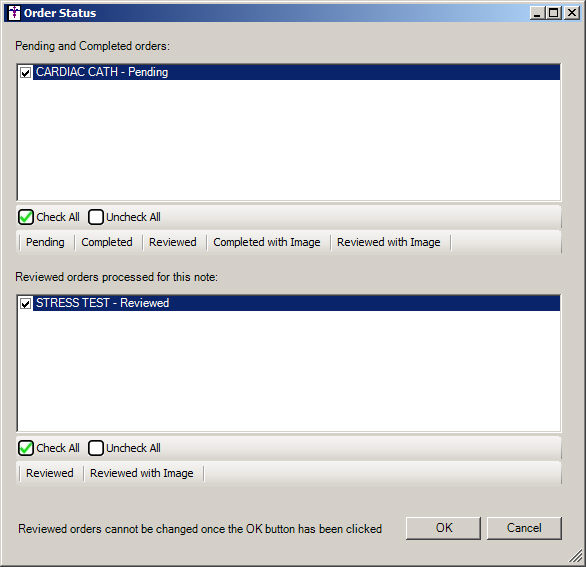
Click the Order
Status button if you want to link a scan or a group of scans to
an outstanding order, and then in the Order Status dialog you can select
the applicable pending and completed orders to update the status. Check
the applicable orders in the Pending and Completed orders section, and
then click the appropriate status option (Pending,
Completed, Reviewed,
Completed with Image, or Reviewed with Image).
In the Reviewed orders processed for this note section you can also
update the status for any orders processed in the current note. Check
the applicable procedure, and then select the appropriate status (Reviewed or Reviewed
with Image).
When finished, click the OK
button.
Check the Stack
scans into one Note
option, if applicable.
Check the Send
to PatientPortal on Signing
option, if applicable.
Check the Scan
as Advance Directive
option, if applicable.
Check the Scan
as Educational Materials
option, if applicable.
Check the Scan
as Patient-Generated Health Data
option, if applicable.
Click the Save
button. The scanned item will then be removed from the original location
and placed in the patient chart.
NOTE: If the scanned image exceeds the maximum scan size threshold,
a warning message will be produced
indicating this scan is larger than the defined size. Click the OK button to continue, or click the
Cancel button to abort. The scan
size threshold can be modified via the Scans
Preferences.
