Click Chart >
Scan Documents.
In the Scan Management dialog, click the Docs tab.
NOTE: If documents were placed in the directory for Unassigned Scans,
click the drop-down in the Docs area, where it currently is set to Local
Files, and select Unassigned Files.
Highlight the applicable Document
in the Docs list.
In the Patient search field, enter the first few
letters of the patient's last name. You can also enter a comma and then
enter the first few letters of the patient's first name. The system will
then return the results of that search. Highlight the Patient
to whom the document belongs.
NOTE: The search criteria can be further refined by adding or subtracting
letters of the patient's name, or by
modifying the Search Column and Search Type fields at the bottom of the
Patient List.
Select any Send
to (to send a reminder to a users To-Do List), Heading,
Practice, Provider,
Date (the note or visit date if
not included in the filename), Folder,
Case, Order
Status (to link the document to an outstanding order and modify
the status of the outstanding order), Scan
as Advance Directive, Scan as
Educational Materials, or Scan
as Patient-Generated Health Data options as needed.
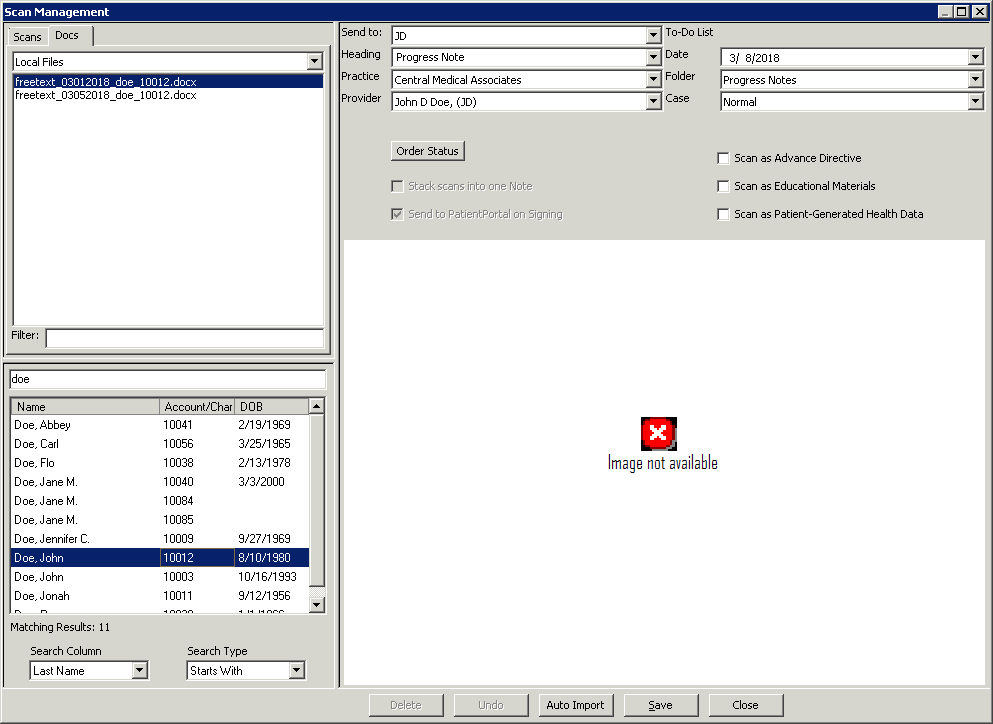
Once the applicable options have been selected,
click the Save button.
NOTE: If any of the Word documents exceeds the maximum scan size threshold,
a warning message will be produced
indicating this file is larger than the defined size. Click the OK button to continue, or click the
Cancel button to abort. The scan
size threshold can be modified via the Scans
Preferences.
