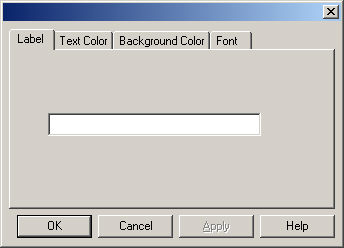
In the gird, right-click the Cell
you want to place a label in, and then click Insert
Label.
In the Label tab, enter the Label
Name you want to appear in the selected cell.
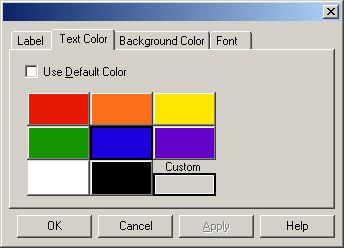
Click the Text
Color tab to modify the color of the label name.
In the Text Color tab, click the applicable color
for the label text, click the Custom
button to select a custom color, or check the Use
Default Color option to use the default color setting.
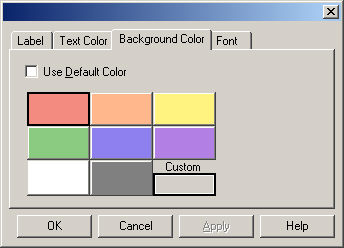
Click the Background
Color tab to modify the color of the background color for the label
cell.
In the Background Color tab, click the applicable
color for the cell background, click the Custom
button to select a custom color, or check the Use
Default Color option to use the default color setting.
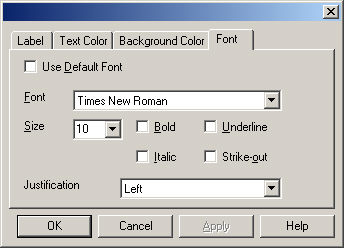
Click the Font
tab to modify the font settings for the label text.
In the Font tab, select the applicable Font,
Size, Formatting
Options, and Justification,
or check the Use Default Font
option to use the default font settings.
When finished, click the OK button. Click the Cancel button if you wish to exit without adding a label.