Click Chart >
Import > Patient Data.
In the Import Options section of the Import Document
dialog, click the Import data to an existing
patient chart radio button if you want to attach the Clinical Document
to an exiting patient's chart, or click the Create
new patient from imported data radio button if you would like to
create a new patient and have the Clinical Document attached to that new
patient.
If you are importing an encrypted file, check
the Decrypt Data option, then
enter the applicable Password,
and then Verify the Password in
the corresponding fields.
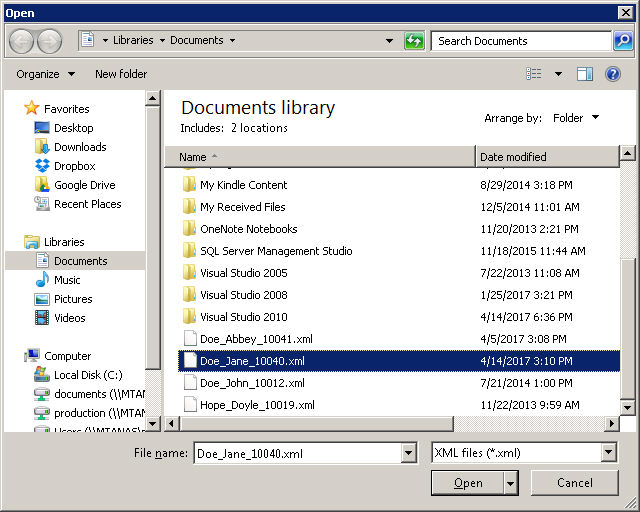
In the File field, click the  button.
In the Open dialog, browse to the location of
the file you want to import, highlight the applicable file, and then click
the Open button. The File field
will now contain the path to the file you are importing.
In the File format field, select Consolidated
CDA (CCDA), Healthcare Information
Technology Panel CCD/C32, or ASTM
Continuity of Care Record (CCR).
Check the This
patient has been transferred or referred to provider, or has not yet seen
the provider option at the bottom-left of the Import Document dialog
to track whether the patient has been transferred, referred, or never
seen the by provider. When this option is selected, it will be counted
toward any applicable Meaningful Use and MIPS 2018 performance measures.
In the Import Configuration section, click the
Configure button to select the
sections and the order those sections will appear in the chart note.
In the CDA Section User Preferences dialog you
have the ability to select which sections you want to be displayed, as
well as the order in which those sections should appear. Check the Display column for those sections you
want to initially appear in the note. Uncheck the Display
column for any of those sections you do not want to initially appear in
the chart note.
To change the order of a section, highlight the applicable section,
and then use the Move Up and/or
the Move Down buttons to modify
that sections position.
When the sections and order have been configured as desired, click
the OK button.
NOTE: Whenever a user modifies the preference settings in the CDA Section
User Preferences dialog and saves those changes by clicking the OK button, the system will save these
user-specific preferences, and the selected sections to display and order
will default when importing subsequent documents for that user.
Click the Next
button. If you are Creating a new patient
based on the imported data, skip to step 12.
When importing patient data for an existing patient,
the Import Document dialog will contain a summary of the patient information
and the Select patient field will
contain the patient's name. Verify that name is correct or modify the
patient as needed. You can also check or uncheck the This
patient has been transferred or referred to provider, or has not yet seen
the provider option, if applicable. When this option is selected,
it will be counted toward any applicable Meaningful Use and MIPS 2018
performance measures. When all of the information is correct, click the
Finish button. The Clinical Document
containing the imported information will then be created. Skip to step
13.
When creating a new patient based on the imported
data, the Import Document dialog will contain a summary of the patient
information and a Chart Information section that allows you to Select
the Practice and Chart Number
for the patient, as needed. The Chart Number filed will contain the next
available chart number so this only needs to be changed if an unique chart
number is needed. You can also check or uncheck the This
patient has been transferred or referred to provider, or has not yet seen
the provider option, if applicable. When this option is selected,
it will be counted toward any applicable Meaningful Use and MIPS 2018
performance measures. When all of the information has been configured
as desired, click the Finish button.
The system will then create a new patient and the Clinical Document containing
the imported information will then be created.
If the imported information is for an existing
patient, their patient’s chart will open with the Clinical Document embedded
in the note with a Clinical Document display widget. If the imported information
is for a new patient, the new patient will be created, their new chart
will open with the Clinical Document embedded in the note with a Clinical
Document display widget.
The display widget has a Configure
display button and Print
button at the top of the display widget that allows you to override the
display configuration for this specific note, if desired, and print the
information in the imported document per the display parameters selected.
Click the Configure display button,
or Print button as needed.
When you click the Configure display
button, a CDA Section User Preferences dialog will appear allowing you
to select which sections you want to be displayed, as well as the order
in which those sections should appear. Do note, only those sections contained
within the imported document will be displayed as selectable options.
Also, any modifications made in the CDA Section User Preferences, accessed
via the display widget, will be for that specific note only and will not
affect any default settings configured in the Import Document dialog.
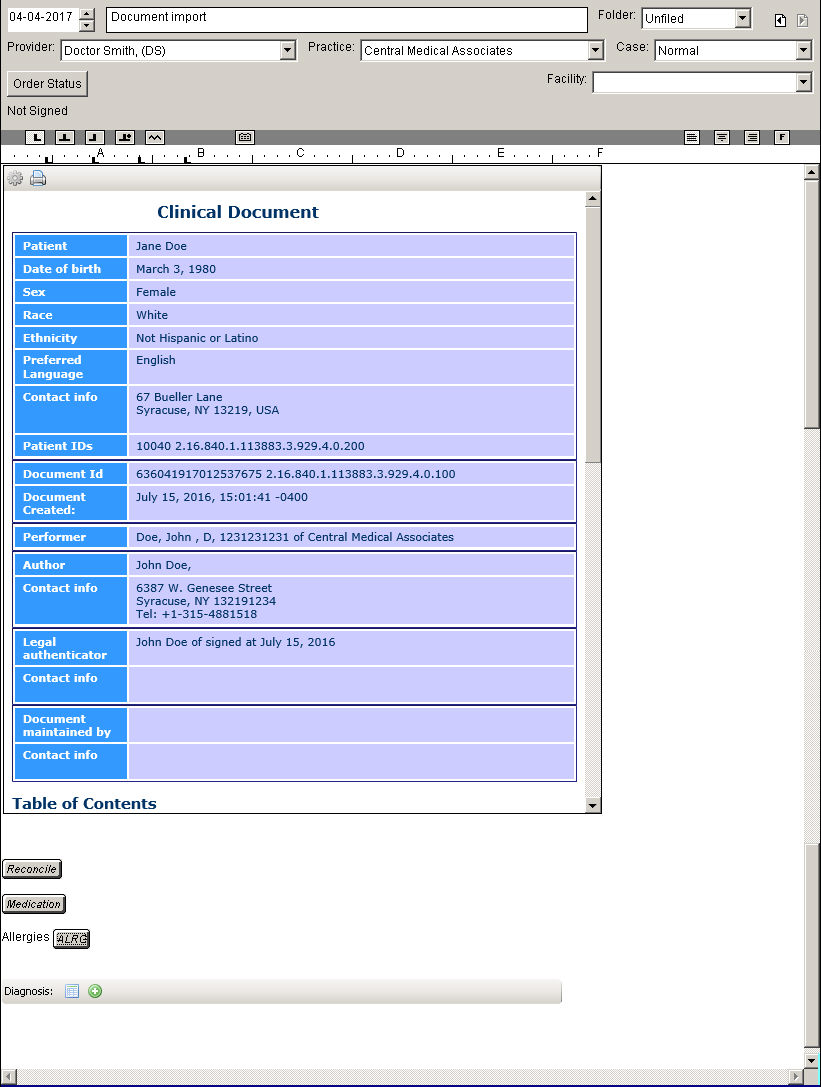
If the imported CCDA file contains an allergies,
diagnoses, or medications, click the Reconciliation
button.
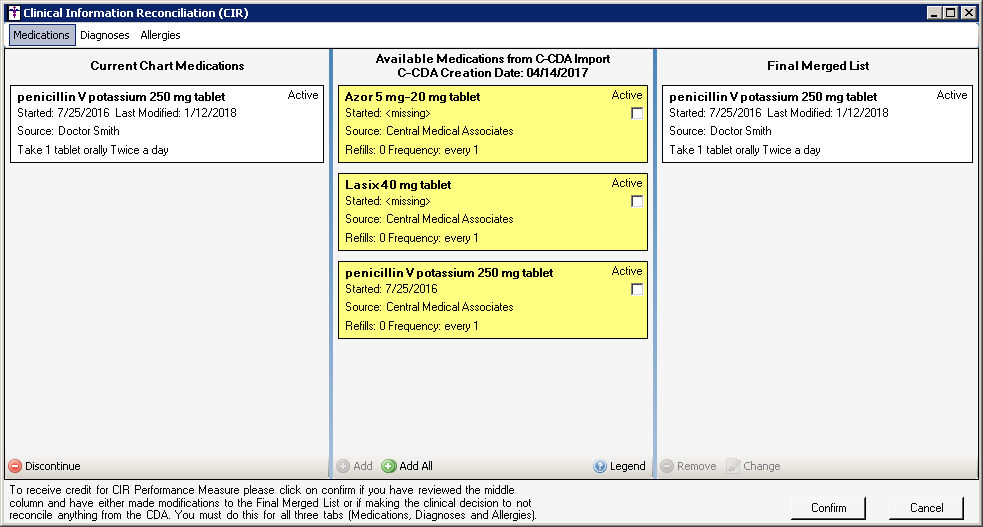
In the Clinical Information Reconciliation dialog
you can view the various Medications, Diagnoses, and Allergies by clicking
the corresponding tab. The allergies, diagnoses, and medications are broken
into the patient’s Current Chart Allergies/Medications, Available Allergies/Medications
from C-CDA Import for the patient, and a Final Merged List. Each list
will show the available allergy (name, start and last modified dates,
and reaction information) and medication (name, start and last modified
dates, and sig information) detail.
Allergies, Diagnoses, and Medications in the Available Allergies/Diagnoses/Medications
from C-CDA Import list are color-coded to denote the level of medication
information available and the ability of importation. You can click the
Legend option for a complete listing.
Allergies, diagnoses, and medications can be moved individually through
by clicking the Add button, or
in bulk using the Add All button.
Each allergy/diagnosis/medication also includes a Skip
checkbox that can be manually selected but will be turned on if the allergy/diagnosis/medication
already exists, has an end date that has passed, or if there isn't enough
information to import the allergy/diagnosis/medication. Allergies, diagnoses,
and medications that have been added will show in the Final Merged List
and labels will be updated to show their status as added.
New medications added to the Final Merged List can be edited by using
the Change button. This will open
the prescribe dialog with as much of the available information found in
the CDA pre-filled. The prescribe dialog will also show the original name,
dates, and text from the import at the bottom.
An added medication can be removed from the list and existing medications
can be discontinued on either the final or current list. If a medication
is discontinued, the discontinue dialog will appear and then the medication
will be marked as ended.
New diagnoses added to the Final Merged List can be edited by using
the Change button. This will open
the Note Diagnosis dialog with as much of the available information found
in the CDA pre-filled.
An added diagnosis can be removed from the list and existing diagnoses
can be resolved on either the final or current list. If a diagnosis is
resolved, the End Diagnosis dialog will appear and then the diagnosis
will be marked as resolved.

New allergies added to the Final Merged List can be edited by using
the Change button. This will open
the Change Allergy dialog allowing you to modify the reaction text. Likewise,
allergies in the final merged list will have a Reviewed
checkbox so they can be marked as reviewed once confirmed. A Review
All link is added at the bottom to quickly mark all items as reviewed.
An allergy can be removed from the Current Chart Allergies list and
the Final Merged List. If an allergy is removed, a Remove Allergy dialog
will appear allowing you to enter a reason for the removing the allergy.
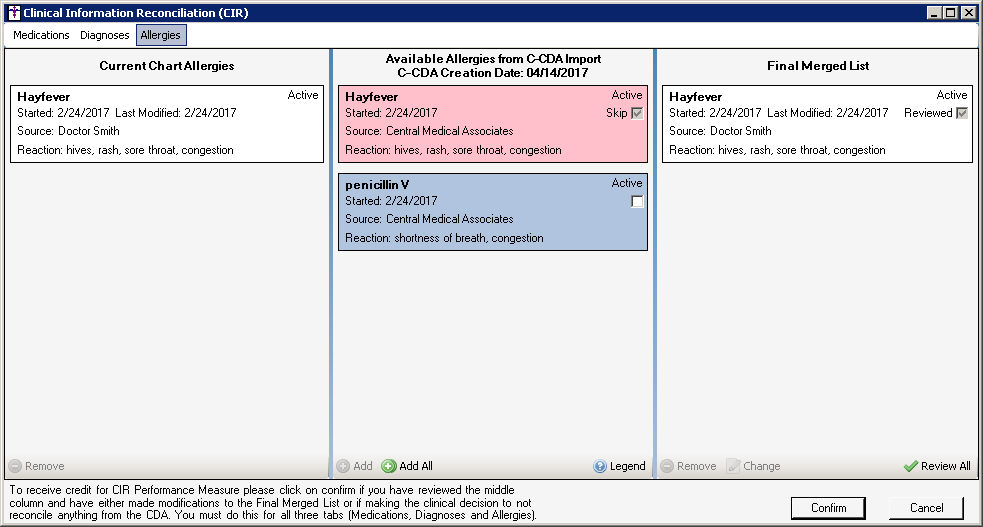
No changes will be made to a patient's chart until the you click the
Confirm button. If the Cancel
button is clicked, no allergies will be removed or added to the chart,
no medications will be discontinued or added to the chart, and no diagnoses
will be resolved or added to the chart. When confirmed, Clinical will
run through all actions and complete them. All output will appear by the
allergy or the prescribe button, or in the diagnosis checklist, in the
note.
Once all allergies/diagnoses/medications are confirmed and moved into
the patient's chart, drug interactions will be performed on all new allergies
and medications. If a drug interaction happens, and no comment has been
added, the Interactions Present screen will appear showing the interaction
and the name of the drug in the title. You will have the option to add
a comment and proceed, or discontinue the drug.
You can then Add
and Modify Allergy Information
via the Allergy button, Add,
Renew, or Discontinue Medications
as needed via the Prescribe button,
or Add
and Modify Diagnosis Information
via the Diagnosis List.
When finished, click the Save button or close out of the chart.